![How to Make Coasters With Cricut? [Step-by-Step Guide]](https://designaccessoriesmart.com/upload/blog/6570501cde633how-to-make-coasters-with-cricut-step-by-step-guide-11zon.webp)
Making coasters with Cricut machines is easy and fun. Anyone with a bit of crafting knowledge or passion can create premium-quality coasters. However, the process seems complex for some crafters, especially if they are beginners. If you also want to know how to make coasters with Cricut, then don't worry cause I have got your back. I will help you complete your first coaster project by sharing my years of crafting skills. Thus, stay tuned to this blog till the end and get every vital info you need to know to create coasters.
What Do You Need to Make a Coaster With Cricut?
Let's take a look at what you need before you learn how to make coasters with Cricut.
- Any Cricut cutting machine
- Cricut Design Space on your computer/smartphone
- StandardGrip machine mat
- Lint brush
- Cricut Heat Guide
- Cricut EasyPress or Cricut EasyPress 2
- Cricut EasyPress Mat
- Heat Resistant Tape
- Cricut Ceramic Coaster Blank
- White Cardstock, and others.
How to Make Coasters With Cricut?
There are numerous methods to create the coasters with Cricut machines and tools. In the guide below, I am sharing where you can create the coasters with Cricut's infusible ink transfer sheet. You can use the help of the guide below to create your own design or the same practice first.
Step 1: Create a Design for the Coaster
- The process of making coasters with Cricut starts with creating a design first.
- For that, open the Cricut software and then access a fresh canvas.
- After that, add the preferred image from the app image library or upload your image.
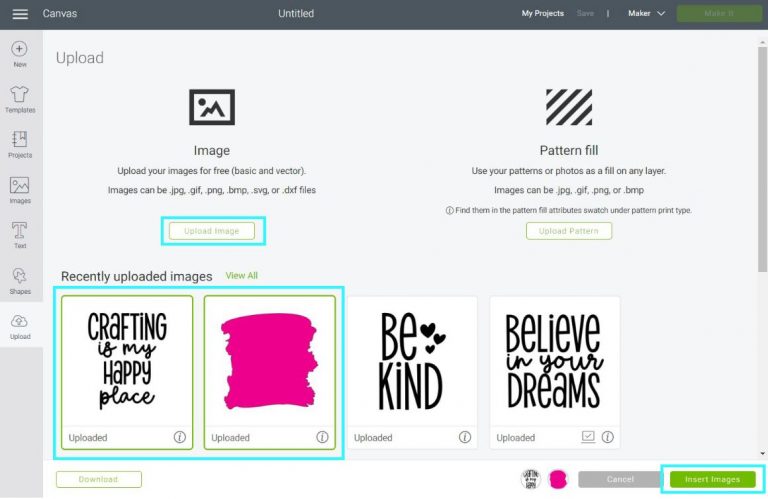
Step 2: Edit Your Image in Design Space
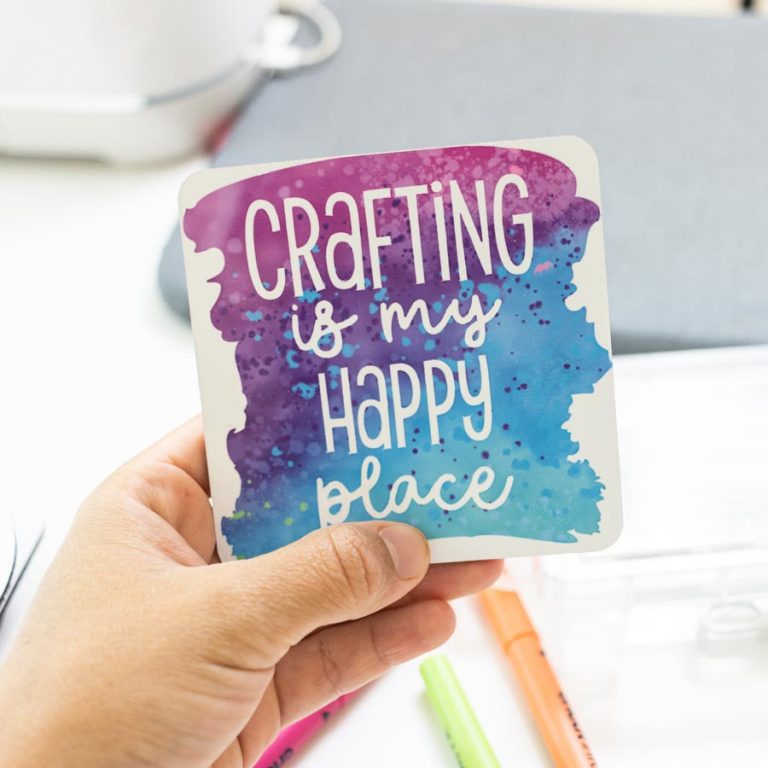
- For this project, I am going to first select the text "Crafting is my happy place" and click on the Weld option. (For your project, you have to select the text/image you have selected)
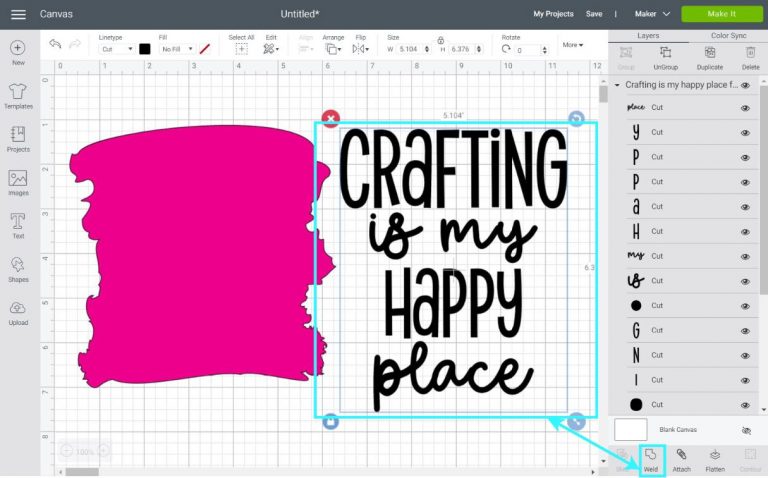
- Next, I am going to resize the text in the pink space and then click on the Slice option after selecting both images. (The Slice option is located next to Weld)
- After slicing the design, you will see a couple of extra layers known as "Slice Results."
- Now, you need to keep the design that appears like the below image.
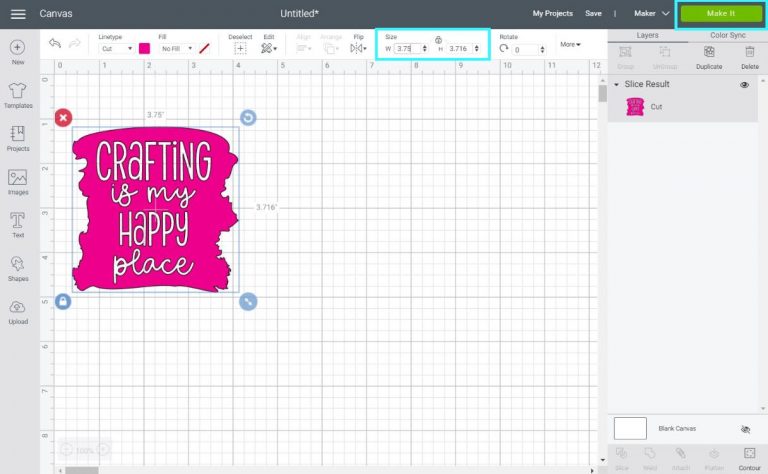
- After that, you have to resize the design so it perfectly fits the coaster.
Step 3: Prepare Your Design for the Cutting Process
- Once the design resizing is complete, click on the Make It option to get the mat preview and then select Continue.

- If you are working with the Infusible Ink, either pens or transfer sheets, you have to "Mirror" the image.
- After that, you have to click on "Browse All Materials" and select the option of "Infusible Ink Transfer Sheets."

Step 4: Cut the Design With a Cricut Machine
- Before you start to work with the transfer sheet, you have to clear your hands.
- Also, keep the sheet away from the moisture.
- Now, take the infusible ink transfer sheet and then place it on the green mat.
- I would suggest using the scraper to smooth the sheet on the mat.
- After that, load the mat on the Cricut machine you are using for cutting the design.
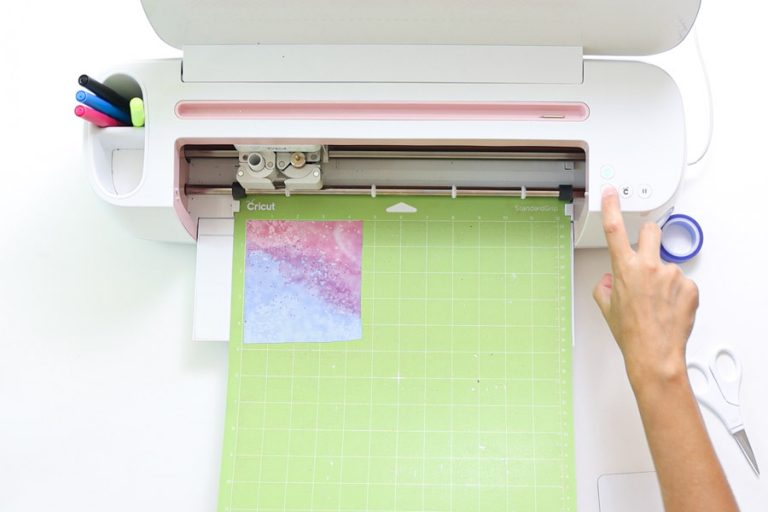
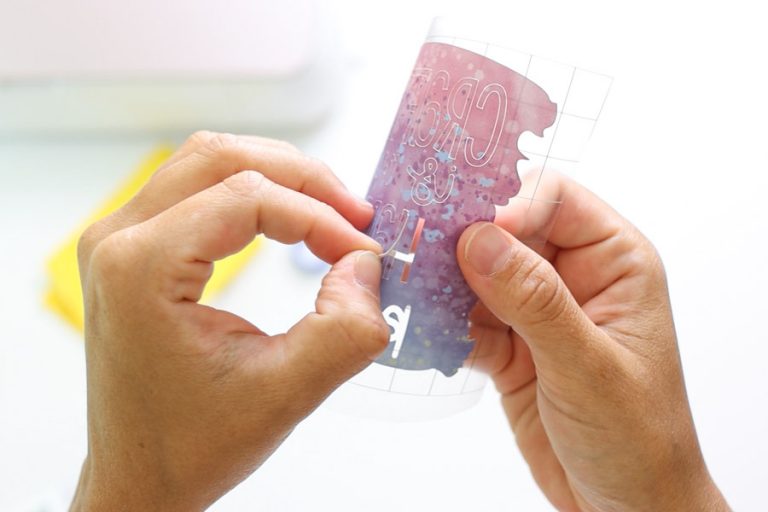
- When the cut is complete, unload the mat and remove excessive parts from the design. (You can use the Cricut weeding tool if you want.)
Step 5: Apply Your Design on a Coaster
- Take the Cricut EasyPress design at 400°F and set the timer for the 60s.
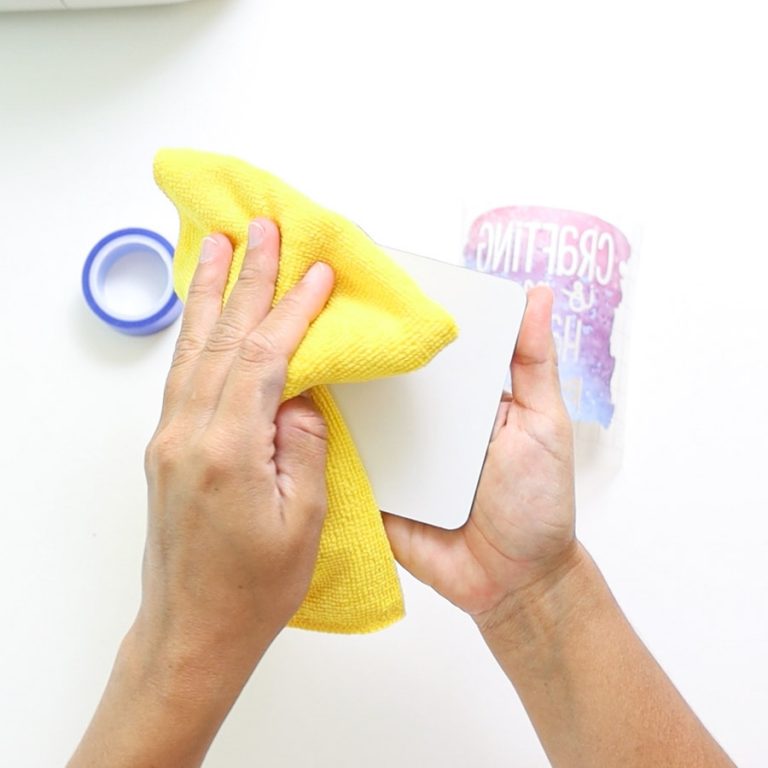
- Clear off the dust from the coaster using the microfiber cloth.
- Keep the coaster on a mat, then save the design material and use butcher paper.
- After that, apply the heat on a coaster with the help of your EasyPress machine.
- Now, your coaster design project will be complete.
Frequently Asked Questions
Here are the tools you must have to create the coaster with the Cricut machine. You must gather all the tools before you start the project.
● Cricut cutting machine
● Printer
● Cricut Design Space on your device
● StandardGrip mat
● Cricut Heat App
● Cricut EasyPress or Cricut EasyPress 2
● Cricut EasyPress mat
● Cricut Ceramic Coaster Blank, others.
The steps to make the coasters with Cricut machines are as follows.
- Open the Cricut app and create a design you want to
make a coaster.
- After that, edit the design and send it for the cut.
- Cut the design by loading the material on the Cricut
machine and pressing the Go button.
- When the design cut is complete, unload the material
from the machine.
- And then weed out the extra part from the design.
- Lastly, attach the design on the coaster using the
EasyPress machine.
For me, all the
Cricut machines come with their own features and specialties. However, for
making the coasters, my Cricut machines are Cricut Maker 3 or Explore. These
machines provide a robust and flawless cutting experience. Also, while using
the Explore or Maker machine, I get premium quality results in making coasters.

David Madock
5+ Year of experience